shaper setup problem?
Moderator: admin
-
kd6vpe
- Platinum Member
- Posts: 585
- Joined: Mon Jun 11, 2007 8:53 pm
- Location: Owasso, Oklahoma
- Contact:
Great work there Dusty thank you. I had bought a shaper fence third party but it did not come with the featherboard. Linda a shopsmith looked up all of the parts and built one from part for me to order since they don't really sell the quill mounted featherboard as a single unit. So you can get one. I have yet to use my shaper but now that I see what you have found I know better when I go to do end grain cuts the featherboard will not work for that type of cut and I won't be so upset thank you for your time and investigative abilities.
SS 500 upgraded to 510; SS bandsaw; SS jointer
SS Oscillating Drum Sander; Universal Lathe Rest;
lathe duplicatior, shaper fence and shapers; SS Belt
Sander
Jim
www.youtube.com/kd6vpe
SS Oscillating Drum Sander; Universal Lathe Rest;
lathe duplicatior, shaper fence and shapers; SS Belt
Sander
Jim
www.youtube.com/kd6vpe
Be Very Carefull!
dusty wrote:I've been thinking about this situation and have decided that I do not know how to set up the shapers (because I have not done that since I had my accident). So, I went to the shop first thing this morning to do a more realistic setup.
After installing the cutters, adjusting the table so that the cutters sit safely in the insert and adjusting the fence for proper depth of cut (I setup for maximum cut depth), I have decided that the "quill mounted featherboard" CANNOT be used in conjunction with the miter fence for reasons already shown.
The following is a possible approach to resolve the original problem.
[ATTACH]7035[/ATTACH]
The tablle and the fence can be moved a little to fine tune these setups but care must be taken so that the cutters and the insert do not simultaneously attempt to occupy the same space.
Dusty--
Mike
Jupiter, FL
Jupiter, FL
FWIW the shaper is not a tool to fool around with. Steady feed and a lite cut are required for good results. I use a Delta shaper with the spindle below the table that has a reversing motor. Perhaps the new SS with the reversing motor will be a bit better, but one still has the spindle over the table. I just don't feel the SS as a shaper is one of it's strong points. With that said, some very nice work has come from members using the SS as a shaper.
ldh
ldh
-
dusty

- Platinum Member
- Posts: 21481
- Joined: Wed Nov 22, 2006 6:52 am
- Location: Tucson (Wildcat Country), Arizona
Shaper Setup Problem?
Mike, anytime a piece of wood decides to go its own direction there is good reason to be concerned.
But, can you be a bit more specific in describing exactly what you were doing. Were you trying to use the rod to prevent the work piece from creeping away from the cutter? Were there any feather boards involved?
A picture would be real neat.
But, can you be a bit more specific in describing exactly what you were doing. Were you trying to use the rod to prevent the work piece from creeping away from the cutter? Were there any feather boards involved?
A picture would be real neat.
"Making Sawdust Safely"
Dusty
Sent from my Dell XPS using Firefox.
Dusty
Sent from my Dell XPS using Firefox.
-
dusty
- Platinum Member
- Posts: 21481
- Joined: Wed Nov 22, 2006 6:52 am
- Location: Tucson (Wildcat Country), Arizona
Shaper Setup Problem?
Thank you, z-man. Thank you, tryinhard.
You two, et al, have brought me back a Christmas gift that I have had for many, many years. I now have a new tool to use in my shop. I now have a shaper.
I have not tooled up the shaper in over a dozen years due to an accident that I had while using the shaper. I nearly lost a finger (with damage to a second) due to this past incident. To this day, I am unable to tell anyone exactly what happened - I don't know. I don't believe the cutter got me but I don't see how a "kickout" could have done it either.
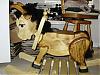
Today, in order to better understand this thread, I tooled that puppy up and made a few "shaper chips".
[ATTACH]7036[/ATTACH] [ATTACH]7037[/ATTACH]
The results are nothing to brag on except that they exist. Now that I have come this far - I will make more shaper chips and I will learn why this cut has so many cutter marks.
NO, I did not have the dust collector connected.
You two, et al, have brought me back a Christmas gift that I have had for many, many years. I now have a new tool to use in my shop. I now have a shaper.
I have not tooled up the shaper in over a dozen years due to an accident that I had while using the shaper. I nearly lost a finger (with damage to a second) due to this past incident. To this day, I am unable to tell anyone exactly what happened - I don't know. I don't believe the cutter got me but I don't see how a "kickout" could have done it either.
Today, in order to better understand this thread, I tooled that puppy up and made a few "shaper chips".
[ATTACH]7036[/ATTACH] [ATTACH]7037[/ATTACH]
The results are nothing to brag on except that they exist. Now that I have come this far - I will make more shaper chips and I will learn why this cut has so many cutter marks.
NO, I did not have the dust collector connected.
- Attachments
-
- PC210008 (Custom).JPG (47.27 KiB) Viewed 2321 times
-
- PC210010 (Custom).JPG (32.5 KiB) Viewed 2318 times
"Making Sawdust Safely"
Dusty
Sent from my Dell XPS using Firefox.
Dusty
Sent from my Dell XPS using Firefox.
-
JPG

- Platinum Member
- Posts: 35457
- Joined: Wed Dec 10, 2008 7:42 pm
- Location: Lexington, Ky (TAMECAT territory)
Which end went 'forward? The end opposite the cutter? If gouging occured, too agressive a feed/cut is indicated.tryinhard wrote:Dusty--
I tried this method but used the safety grip hold down as well. It was DISASTER! Even though I was holding the safety grip for dear life, the workpiece JUMPED FORWARD (yes, forward) and I turned white. After I shut everything down, the workpiece had a huge gouge where it had dug into the cutter. I don't think I will try this again.
BTW Those folks who are wary of Shapers, stay clear of Molders!
╔═══╗
╟JPG ╢
╚═══╝
Goldie(Bought New SN 377425)/4" jointer/6" beltsander/12" planer/stripsander/bandsaw/powerstation /Scroll saw/Jig saw /Craftsman 10" ras/Craftsman 6" thicknessplaner/ Dayton10"tablesaw(restoredfromneighborstrashpile)/ Mark VII restoration in 'progress'/ 10E[/size](SN E3779) restoration in progress, a 510 on the back burner and a growing pile of items to be eventually returned to useful life. - aka Red Grange
-
dusty
- Platinum Member
- Posts: 21481
- Joined: Wed Nov 22, 2006 6:52 am
- Location: Tucson (Wildcat Country), Arizona
JPG40504 wrote:Which end went 'forward? The end opposite the cutter? If gouging occured, too agressive a feed/cut is indicated.
BTW Those folks who are wary of Shapers, stay clear of Molders!
OKAY. I hear your warning - Loud and Clear - but would you care to explain why you feel this why?
Yes, the cutters move at a higher speed but what else?
"Making Sawdust Safely"
Dusty
Sent from my Dell XPS using Firefox.
Dusty
Sent from my Dell XPS using Firefox.
-
JPG
- Platinum Member
- Posts: 35457
- Joined: Wed Dec 10, 2008 7:42 pm
- Location: Lexington, Ky (TAMECAT territory)
dusty wrote:OKAY. I hear your warning - Loud and Clear - but would you care to explain why you feel this why?
Yes, the cutters move at a higher speed but what else?
The ability to 'gouge' is also increased with the increase in radius. Also their angled flat sides with greater depth also increases the severity of the gouge(grab).
Although I like their effectiveness, I greatly respect their ability to create disastrous conditions(both for the workpiece and the operator).
My point was that they are more likely to result in a more hazardous result if too aggressive a cut is attempted.
BTW Your shaped workpiece has me puzzled also. What surface/shape are we looking at?
╔═══╗
╟JPG ╢
╚═══╝
Goldie(Bought New SN 377425)/4" jointer/6" beltsander/12" planer/stripsander/bandsaw/powerstation /Scroll saw/Jig saw /Craftsman 10" ras/Craftsman 6" thicknessplaner/ Dayton10"tablesaw(restoredfromneighborstrashpile)/ Mark VII restoration in 'progress'/ 10E[/size](SN E3779) restoration in progress, a 510 on the back burner and a growing pile of items to be eventually returned to useful life. - aka Red Grange
╟JPG ╢
╚═══╝
Goldie(Bought New SN 377425)/4" jointer/6" beltsander/12" planer/stripsander/bandsaw/powerstation /Scroll saw/Jig saw /Craftsman 10" ras/Craftsman 6" thicknessplaner/ Dayton10"tablesaw(restoredfromneighborstrashpile)/ Mark VII restoration in 'progress'/ 10E[/size](SN E3779) restoration in progress, a 510 on the back burner and a growing pile of items to be eventually returned to useful life. - aka Red Grange
-
dusty
- Platinum Member
- Posts: 21481
- Joined: Wed Nov 22, 2006 6:52 am
- Location: Tucson (Wildcat Country), Arizona
Shaper Setup Problem?
I don't know what I have mounted without going out to look but what has you confused (I believe) is that I have taken a very shallow cut. Only the very tips are touching the work piece.
I have NOT been using my shaper. I have avoided using it for many years. Doing this shallow cut, along with this thread, marks my coming out.
I think.
One thing that happened, during this test cut, was a movement of the quill. I need to check that out before I do anything more. The quill does not seem to be adequately secured even if I crank down on the quill lock.
"Making Sawdust Safely"
Dusty
Sent from my Dell XPS using Firefox.
Dusty
Sent from my Dell XPS using Firefox.
-
JPG
- Platinum Member
- Posts: 35457
- Joined: Wed Dec 10, 2008 7:42 pm
- Location: Lexington, Ky (TAMECAT territory)
dusty wrote:I don't know what I have mounted without going out to look but what has you confused (I believe) is that I have taken a very shallow cut. Only the very tips are touching the work piece.
I have NOT been using my shaper. I have avoided using it for many years. Doing this shallow cut, along with this thread, marks my coming out.
I think.
One thing that happened, during this test cut, was a movement of the quill. I need to check that out before I do anything more. The quill does not seem to be adequately secured even if I crank down on the quill lock.
It is those diagonal ridges that have me confused. If they are not part of the shaper formed surface, they are irrelevant.
╔═══╗
╟JPG ╢
╚═══╝
Goldie(Bought New SN 377425)/4" jointer/6" beltsander/12" planer/stripsander/bandsaw/powerstation /Scroll saw/Jig saw /Craftsman 10" ras/Craftsman 6" thicknessplaner/ Dayton10"tablesaw(restoredfromneighborstrashpile)/ Mark VII restoration in 'progress'/ 10E[/size](SN E3779) restoration in progress, a 510 on the back burner and a growing pile of items to be eventually returned to useful life. - aka Red Grange
╟JPG ╢
╚═══╝
Goldie(Bought New SN 377425)/4" jointer/6" beltsander/12" planer/stripsander/bandsaw/powerstation /Scroll saw/Jig saw /Craftsman 10" ras/Craftsman 6" thicknessplaner/ Dayton10"tablesaw(restoredfromneighborstrashpile)/ Mark VII restoration in 'progress'/ 10E[/size](SN E3779) restoration in progress, a 510 on the back burner and a growing pile of items to be eventually returned to useful life. - aka Red Grange