Campaign Chest

This is a forum for intermediate to advanced woodworkers. Show off your projects or share your ideas.

Moderator: admin

Post Reply
ericolson
Gold Member
Posts: 152
Joined: Wed Jan 03, 2007 12:07 pm
Location: Springfield, MO

Campaign Chest

Post by ericolson »

I'm still figuring out the whole Photobucket thing, so if I screw this up, somebody please fix me!!

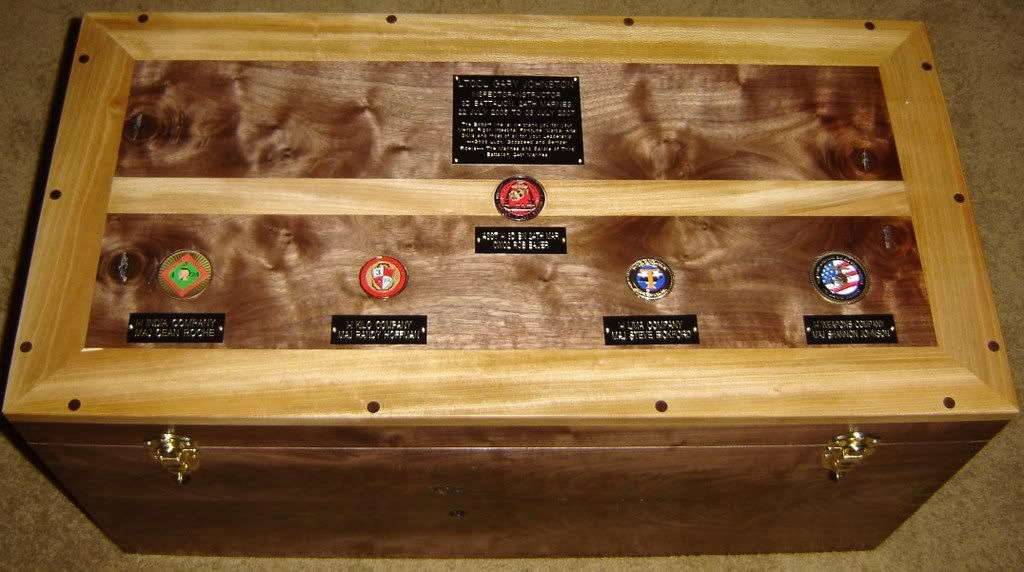
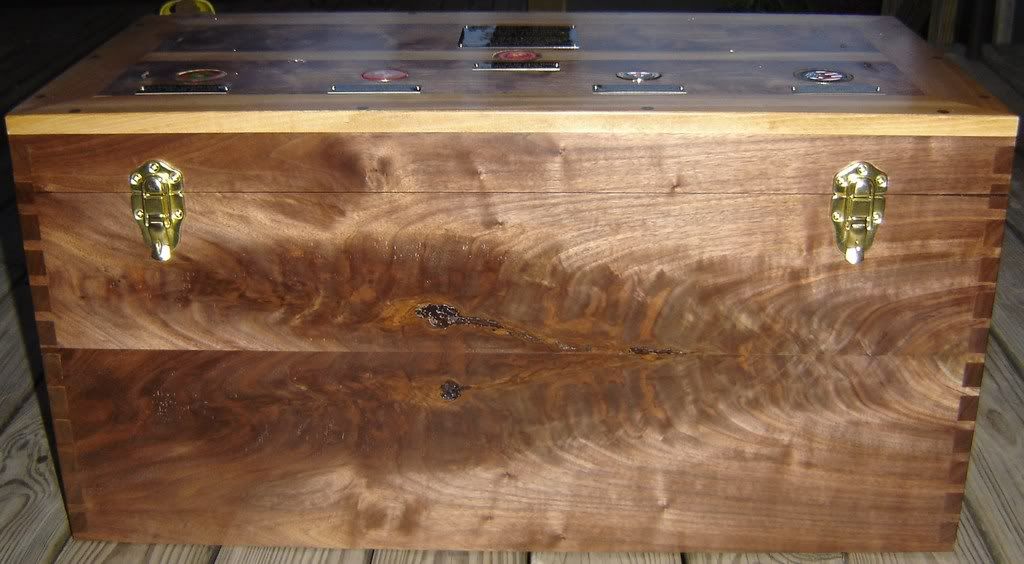
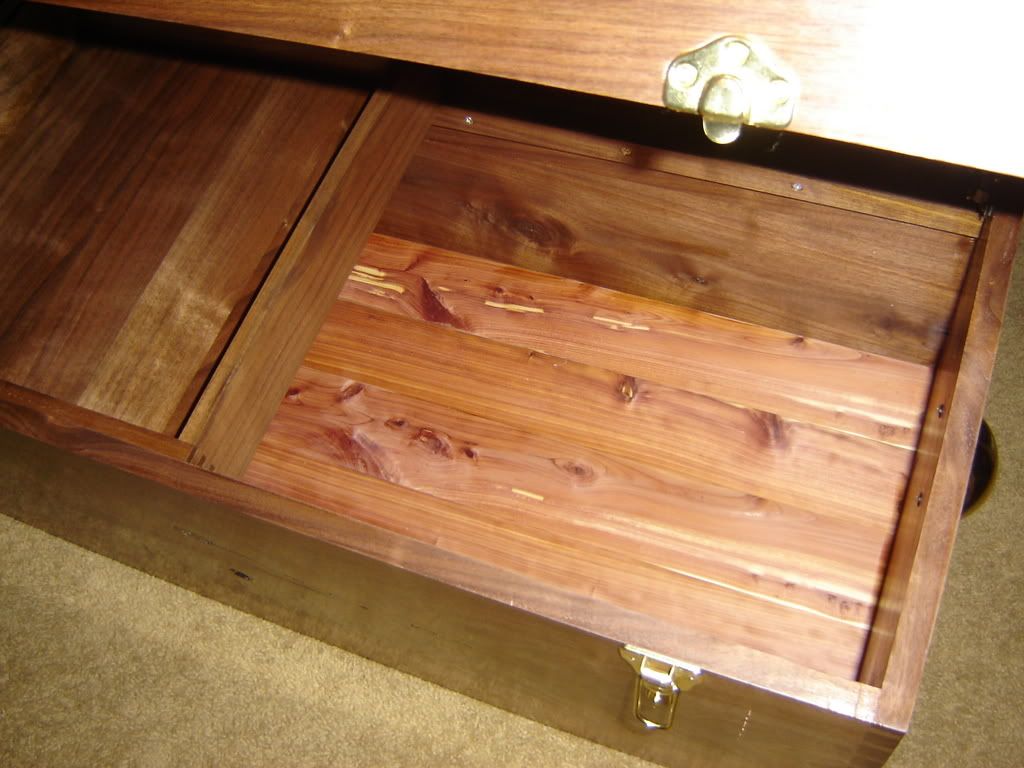
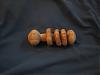
This is a chest I built for a military client. I call it a Campaign Chest and it's loosely based off of one I sw at the museum at the Wilson's Creek Civil War Battlefield. It's made of Walnut and Sycamore. I started off with rough lumber, face jointing, edge jointing, and planing to the approximate thickness I wanted. I then resawed the stock in order to book match the walnut. I wanted a continuous grain all the way around the chest, so I very carefully cut the components (sides, front, back) out of the bookmatched stock. I was able to just barely get all four sides. I used my Leigh jig to mill the dovetails. The lid was made with Sycamore trim around bookmatched walnut. I sawed the lid off on my tablesaw. The walnut plugs in the top were made with a plug cutter and my Goldie SS. I inlaid the challenge coins using several templates, a plunge router, and template guide. It just figures that not one of the coins was the same dimension, so I had a lot of fun using the SS and a circle cutter (MANY times) to get the templates to match the diameter of each coin. The finish is four coats of tung oil (each coat dried one day and was wet sanded with 400g wet/dry paper and mineral spirits). The final coat is a personal blend of tung oil, beeswax from a neighbor's hives, and mineral spirits; buffed out with a lint free cloth. From start to finish, about two weeks' worth of work, with the longest stretch being the finishing process.

Image

Image

Image

Image
Eric
Rock Creek Designs


Win if you can, lose if you must, but always cheat!
scottss
Gold Member
Posts: 301
Joined: Mon Aug 14, 2006 10:46 am
Location: Pacific Northwest Washington State

Post by scottss »

Nice work Eric. I was curious how did you cut the dovetails? Also what circle cutter are you talking about?
charlese
Platinum Member
Posts: 7501
Joined: Fri Dec 08, 2006 10:46 pm
Location: Lancaster, CA

Post by charlese »

Eric- Beautiful work and a beautiful chest. I'm sure your friend will be very, very pleased. Any or all of your pride in this piece is truly well justified.

I find it difficult to see how you built this chest in only two weeks! It would have taken me about double that time. But time is not a concern, the real concern is quality, and you have reached a high pinnacle here.

I Love the book matched sides and especially the matching result sawing the lid off of the sides.

I can only imagine the trials with the coin inlays! But now, I'll bet that was one of the fun parts of the project.

You asked about the photo bucket - Don't know quite what you mean here, but couldn't help but notice the posting more than filled the space and I had to scroll left and right to read it. Maybe that issue is mine, not yours - maybe Admin can help.

On another subject I can't wait to read about your self made oak and hickory boards are drying. I feel for all the difficulties you have had in the past year and marvel at your resilience.

Keep up the good work!
Octogenarian's have an earned right to be a curmudgeon.
Chuck in Lancaster, CA
flashbacpt
Gold Member
Posts: 156
Joined: Mon Aug 14, 2006 9:41 pm
Location: Concord, Ca.

Campaign Chest

Post by flashbacpt »

Way to Go! Very nicely done! A "labor of Love" fitting those coins!:)
User avatar
dusty
Platinum Member
Posts: 21481
Joined: Wed Nov 22, 2006 6:52 am
Location: Tucson (Wildcat Country), Arizona

Campaign Chest

Post by dusty »

Absolutely gorgeous work Eric. It is easy to see the "Labor of Love" that went into this.

When you cut off the lid, do you somehow fill the kerf so that the top and bottom don't close on the blade.

This might be the time to take the cover off the upper saw guard and use just the riving knife (514367).
"Making Sawdust Safely"
Dusty
Sent from my Dell XPS using Firefox.
User avatar
john
Platinum Member
Posts: 1046
Joined: Mon Mar 05, 2007 7:42 pm
Location: St. Lambert , Quebec

Post by john »

Eric:

That is one nice piece of work!!

Like Charlese said, that would also take me a lot longer than two weeks. In fact I would still be thinking about it after that short period of time.

Congratulations.

John
muncyjohn
Gold Member
Posts: 32
Joined: Sun May 13, 2007 9:15 pm

Post by muncyjohn »

Beautiful job on that one for sure! I don't know if 2 weeks would be enough time for me to get the plaining and resawing done!
John in Muncy Pa.

SS 510 w/most accessories
Wife says I should have bought this in the first place and she is always right, just takes a little convincing!
User avatar
rkh2
Platinum Member
Posts: 602
Joined: Thu Jul 20, 2006 10:56 am
Location: Lewisburg, TN

Post by rkh2 »

Great Job!!. So nice I would hate to give it up. Love the way you have the bookmarked walnut and it really stands out with the Sycamore trim. Just can't say enough wows.
Ron from Lewisburg, TN
ericolson
Gold Member
Posts: 152
Joined: Wed Jan 03, 2007 12:07 pm
Location: Springfield, MO

Post by ericolson »

"When you cut off the lid, do you somehow fill the kerf so that the top and bottom don't close on the blade."

Dusty, whenever I did this in the past, I would make an initial cut and put little wedges in the kerf. The was met with mediocre success. This time around, I cut three sides first. Then, for the final cut to release the lid, I double-stick taped 1/4" pieces of scrap hardboard across the opposite side kerf to keep it open so it wouldn't bind on the blade.


"I was curious how did you cut the dovetails? Also what circle cutter are you talking about?"

ScottSS, I used my Leigh D4R 24" dovetail jig to mill the dovetails in the sides. I found it a few years ago in a 2nd hand shop, buried underneath a bunch of junk and covered in dust. Picked it up for a whopping $45.00. The circle cutter is one of those adjustable ones that can cut either circles or wooden wheels on the drill press. Got it at Sears and was one of my very first tool purchases. I love the thing.

Two weeks was one heck of a deadline. Especially when I only had the evenings and two weekends to get it done. The hardest part was the finish, as that took about four days by itself. The bookmatching is definitely one of the advantages of being able to mill my own stock. I've got a great sawyer out here that I've developed a good rapport with. He knows to keep stock for me that's "in the rough" (fresh off his mill), in long lengths, and at least 1 1/4" thick, preferably 2". That way, with resawing, I always have plenty of thickness for jointing and planing. He also keeps slabs and other "throw away" stuff left over from the log milling process. I've gotten some nice live-edge cherry from him for Nakashima-style table tops, etc. As a side note, I very rarely work with standard dimensioned lumber. Again, another advantage to lumber in the rough. Instead of the usual stuff we can get at a Big Box store (3/4", 1/2"), I can easily mill 8/4 stock for large table tops, legs, etc. All this is a result of living in an area where quality hardwoods are often used as firewood!!!

I appreciate all of the kind comments!! The hard work paid off: I had a very happy client, I made money, and yes: it was VERY difficult to part with!
Eric
Rock Creek Designs


Win if you can, lose if you must, but always cheat!
User avatar
nuhobby
Platinum Member
Posts: 2359
Joined: Fri Sep 21, 2007 4:34 am
Location: Indianapolis

Post by nuhobby »

Hi,

I wanted to resurrect this thread because Eric had such a super project which stuck in my memory.

I was thinking of his project when I made a very small box this week, using a couple of similar techniques. This box is meant to hold and honor a book....

Merry Christmas & Happy New Year & Happy Holidays to All !!
Attachments
Box Top.jpg
Box Top.jpg (39.85 KiB) Viewed 5591 times
Box Open.jpg
Box Open.jpg (45.99 KiB) Viewed 5593 times
Chris
Post Reply