Well.... Another "new" greenie
Moderator: admin
I admire those that restore SS!
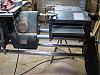
I hope I'm not hijacking this thread, but I just returned from looking at the "very old" SS. It was a "goldie". A solid frame and tubes with a bit of rust. The table would not raise due to both gears being stripped. The table carriage would slide well enough but the handle was pushed in and scraped the carriage. it was missing everything but the sanding disk, table and tail stock. Nothing else to be found! The head stock could be turned with the disk. It grabbed twice on each revolution. I didn't even try to move the speed control. It was set at the top end. The seller said it would start, but then flip the breaker. I suspect it was just because of being on high speed, but not sure. Since I was primarily looking to fix one up and maybe make it a gift, I declined at $100. I just could not see myself doing all that needed to be done and finding all the parts. I might have come out ok by parting it out IF the headstock was ok, but I had no way of being even somewhat sure. I salute you who do this, it is amazing to see what you accomplish. Maybe I will try again if I find the right machine.
Saw dust heals many wounds. RLTW
Dave
Dave
-
JPG

- Platinum Member
- Posts: 35600
- Joined: Wed Dec 10, 2008 7:42 pm
- Location: Lexington, Ky (TAMECAT territory)
dlbristol wrote:I hope I'm not hijacking this thread, but I just returned from looking at the "very old" SS. It was a "goldie". A solid frame and tubes with a bit of rust. The table would not raise due to both gears being stripped. The table carriage would slide well enough but the handle was pushed in and scraped the carriage. it was missing everything but the sanding disk, table and tail stock. Nothing else to be found! The head stock could be turned with the disk. It grabbed twice on each revolution. I didn't even try to move the speed control. It was set at the top end. The seller said it would start, but then flip the breaker. I suspect it was just because of being on high speed, but not sure. Since I was primarily looking to fix one up and maybe make it a gift, I declined at $100. I just could not see myself doing all that needed to be done and finding all the parts. I might have come out ok by parting it out IF the headstock was ok, but I had no way of being even somewhat sure. I salute you who do this, it is amazing to see what you accomplish. Maybe I will try again if I find the right machine.
A basket case with a multitude of missing pieces is, i agree, not a good first experience.
╔═══╗
╟JPG ╢
╚═══╝
Goldie(Bought New SN 377425)/4" jointer/6" beltsander/12" planer/stripsander/bandsaw/powerstation /Scroll saw/Jig saw /Craftsman 10" ras/Craftsman 6" thicknessplaner/ Dayton10"tablesaw(restoredfromneighborstrashpile)/ Mark VII restoration in 'progress'/ 10E[/size](SN E3779) restoration in progress, a 510 on the back burner and a growing pile of items to be eventually returned to useful life. - aka Red Grange
╟JPG ╢
╚═══╝
Goldie(Bought New SN 377425)/4" jointer/6" beltsander/12" planer/stripsander/bandsaw/powerstation /Scroll saw/Jig saw /Craftsman 10" ras/Craftsman 6" thicknessplaner/ Dayton10"tablesaw(restoredfromneighborstrashpile)/ Mark VII restoration in 'progress'/ 10E[/size](SN E3779) restoration in progress, a 510 on the back burner and a growing pile of items to be eventually returned to useful life. - aka Red Grange
Some before pictures.
I thought I had some pictures of the headstock as I was tearing it down but I couldn't find them when I looked for them the other day.....
I found them today, on my phone.
Here are some pictures of the headstock as I was stripping it for cleaning.
[ATTACH]8389[/ATTACH]
[ATTACH]8390[/ATTACH]
[ATTACH]8391[/ATTACH]
[ATTACH]8392[/ATTACH]
[ATTACH]8393[/ATTACH]
I found them today, on my phone.
Here are some pictures of the headstock as I was stripping it for cleaning.
[ATTACH]8389[/ATTACH]
[ATTACH]8390[/ATTACH]
[ATTACH]8391[/ATTACH]
[ATTACH]8392[/ATTACH]
[ATTACH]8393[/ATTACH]
- Attachments
-
- dirty hs1.jpg (92.6 KiB) Viewed 3212 times
-
- dirty hs2.jpg (63.59 KiB) Viewed 3211 times
-
- dirty hs3.jpg (69.72 KiB) Viewed 3211 times
-
- dirty hs4.jpg (127.22 KiB) Viewed 3213 times
-
- dirty hs5.jpg (108.78 KiB) Viewed 3210 times
Mike......... Rowlett, Texas, near Dallas
86 MK V 500/520. 59 MK 5 Greenie Shorty. SS Jointer, SS Planer,
SS Bandsaw, SS Lathe duplicator, SS Belt Sander,SS Molder & Shaper,
SS Tenon master jig, SS Mortising kit, SS 2 1/4' Drum Sanders, Ringmaster, DC3300....
86 MK V 500/520. 59 MK 5 Greenie Shorty. SS Jointer, SS Planer,
SS Bandsaw, SS Lathe duplicator, SS Belt Sander,SS Molder & Shaper,
SS Tenon master jig, SS Mortising kit, SS 2 1/4' Drum Sanders, Ringmaster, DC3300....
And here is a post of today's progress.
Painted, polished and burned (sun burned:p) all day today.
The legs look nice
[ATTACH]8394[/ATTACH]
You can see the tubes, tailstock, ...
[ATTACH]8395[/ATTACH]
Mostly this is the headstock
[ATTACH]8396[/ATTACH]
casters, belt cover, miter gauge... and some polished stuff too. Nothing like mickeyd's but not bad.
[ATTACH]8397[/ATTACH]
Yep folks that is almost a whole SHOPSMITH MK 5 sitting there waiting for some parts from SHOPSMITH to put it together. Well I'm letting the paint dry and harden too.
[ATTACH]8398[/ATTACH]
And that brings you up to date on 320395
Painted, polished and burned (sun burned:p) all day today.
The legs look nice
[ATTACH]8394[/ATTACH]
You can see the tubes, tailstock, ...
[ATTACH]8395[/ATTACH]
Mostly this is the headstock
[ATTACH]8396[/ATTACH]
casters, belt cover, miter gauge... and some polished stuff too. Nothing like mickeyd's but not bad.
[ATTACH]8397[/ATTACH]
Yep folks that is almost a whole SHOPSMITH MK 5 sitting there waiting for some parts from SHOPSMITH to put it together. Well I'm letting the paint dry and harden too.
[ATTACH]8398[/ATTACH]
And that brings you up to date on 320395
- Attachments
-
- painted 6.jpg (135.84 KiB) Viewed 3209 times
-
- painted 1.jpg (50.29 KiB) Viewed 3213 times
-
- painted 2.jpg (100.79 KiB) Viewed 3209 times
-
- painted 3.jpg (109.28 KiB) Viewed 3211 times
-
- painted 5.jpg (134.32 KiB) Viewed 3207 times
Mike......... Rowlett, Texas, near Dallas
86 MK V 500/520. 59 MK 5 Greenie Shorty. SS Jointer, SS Planer,
SS Bandsaw, SS Lathe duplicator, SS Belt Sander,SS Molder & Shaper,
SS Tenon master jig, SS Mortising kit, SS 2 1/4' Drum Sanders, Ringmaster, DC3300....
86 MK V 500/520. 59 MK 5 Greenie Shorty. SS Jointer, SS Planer,
SS Bandsaw, SS Lathe duplicator, SS Belt Sander,SS Molder & Shaper,
SS Tenon master jig, SS Mortising kit, SS 2 1/4' Drum Sanders, Ringmaster, DC3300....
Thanks Chuck, I have a tendency to look back and question decisions some times, but not that one. I did a bit of looking at new and used parts and I would have had $500 in parts pretty quickly to fix this. An upgrade would have been at least that much, and probably the only way to get a real usable machine, so I am satisfied. The seller was a bit miffed, arguing that the head stock was worth the $100. I learned a lot , and will keep looking.
Saw dust heals many wounds. RLTW
Dave
Dave

Dave,
Keep looking; decent ones are still out there.
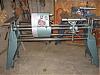
I put an add in the local shoppers and picked up a $100 greenie within 65 miles. It is now stripped down and just needs about $40 worth of parts and some TLC and it will be as good as new. Doesn't have the sander, or lathe "stuff", but I have all this on my other unit so it is not needed.
Keep looking; decent ones are still out there.
I put an add in the local shoppers and picked up a $100 greenie within 65 miles. It is now stripped down and just needs about $40 worth of parts and some TLC and it will be as good as new. Doesn't have the sander, or lathe "stuff", but I have all this on my other unit so it is not needed.
Monte in Missouri
Two 1954 Mark V's: #268502 and #267199
Two 1954 Mark V's: #268502 and #267199
-
wannabewoodworker

- Platinum Member
- Posts: 626
- Joined: Mon Feb 15, 2010 11:36 am
- Location: Milford, CT
Mike,
Your headstock looks very familiar I just posted pics of my newly painted headstock and the rest of the parts. I used black/gunmetal hammered for the other parts that you painted green. I would have used the green if it were available but I couldn't find it locally so I went with the black/silver theme. It is a labor of love for sure and i am itching to get mine completed as you are I am sure. I also am waiting now on completing the painting of the legs and then getting the parts I need to finish the headstock. Soon real soon!
Your headstock looks very familiar I just posted pics of my newly painted headstock and the rest of the parts. I used black/gunmetal hammered for the other parts that you painted green. I would have used the green if it were available but I couldn't find it locally so I went with the black/silver theme. It is a labor of love for sure and i am itching to get mine completed as you are I am sure. I also am waiting now on completing the painting of the legs and then getting the parts I need to finish the headstock. Soon real soon!
Michael Mayo
Senior IT Support Engineer
Soft Designs Inc.
albiemanmike@gmail.com
1960's SS Mark VII, 1954 Greenie, 1983 Mark V, Jointer, Bandsaw, Jigsaw, Dewalt Slider, Delta Super 10, Delta 8" Grinder, Craftsman compressor, Drill Doctor, Kreg PH Jig, Bosch Jigsaw, Craftsman Router and Table...........and adding more all the time....
Senior IT Support Engineer
Soft Designs Inc.
albiemanmike@gmail.com
1960's SS Mark VII, 1954 Greenie, 1983 Mark V, Jointer, Bandsaw, Jigsaw, Dewalt Slider, Delta Super 10, Delta 8" Grinder, Craftsman compressor, Drill Doctor, Kreg PH Jig, Bosch Jigsaw, Craftsman Router and Table...........and adding more all the time....

Yes, the set screw in the eccentric bushing has enough room to come loose allowing the bearing to start out of the eccentric bushing. The washer was too small to prevent this from occurring. I had a headstock last week with this problem. This destroyed the Poly-V and motor drive belts too.JPG40504 wrote:Idler bearing eccentric 'KEEPER' pix!
First is the retaining clip(which ss refers to as a keeper).
[ATTACH]8386[/ATTACH]
Next shows the outer arm length. It will prevent the bearing from drifting out the back. The small arm on the other end will prevent the eccentric from drifting into the headstock.
[ATTACH]8388[/ATTACH]
Next shows it all assembled.
[ATTACH]8387[/ATTACH]
Notice this makes the assembly proud of the casting(an early sandcasting).
For purposes of accuracy, note that the idler shaft is a poly-v version.
As for the eccentric set screw coming loose, it should be long enough that the inside of the bore prevents the tip from coming completely out of the groove in the bearing. I defer to Bill's experienvce that says they come loose. If the set screw is aligned with the bottom of the bore, it could come out, but that position is unlikely even with a new belt(eccentric set for minimum separation from idler to main shaft.
The last picture shows why I do not use the clips on the early sand cast housings. The eccentric bushing with the clips does not allow me to have the Gilmer belt tracking in the center of the drive sleeve pully. With the 2 clips, the Gilmer belt normally rides againest the back ridge of the drive sleeve pulley causing the Gilmer belt to fray on that edge. I drill and tap a hole in the housing above the back of the eccentric bushing, I use a screw and body washer to prevent the eccentric bushing and the bearing from moving out of the housing.
The eccentric bushing set screw is to prevemt the outter race of the idler shaft from spinning inside the eccentic bushing. The eccentric bushing Shopsmith has been using lately has no set screw but the eccentric bushing has a gap at its thinest part so the eccentric bushing can compress around the bearing when the bolt below the eccentric bushing is tighten. I used my metal cutting bandsaw to cut the thinest part and discarded the set screw. It is just really hard to get this cut eccentric bushing I made onto the bearing.
Bill Mayo bill.mayo@verizon.net
Shopsmith owner since 73. Sell, repair and rebuild Shopsmith, Total Shop & Wood Master headstocks, SPTs, attachments, accessories and parts. US Navy 1955-1975 (FTCS/E-8)
Shopsmith owner since 73. Sell, repair and rebuild Shopsmith, Total Shop & Wood Master headstocks, SPTs, attachments, accessories and parts. US Navy 1955-1975 (FTCS/E-8)