need help old shopsmith
Moderator: admin
need help old shopsmith
i was given this shopsmith. it has a serial num 295104 it has no top belt. i think it has been sitting about 20 yrs. no axsess hole to see inside , looks like gilmer belt,it has splines. is it worth restoring and can i do it. getting ready to retire and dont have a lot of money.i live in utah.

Without seeing it, I'd guess it wood be worthwhile to restore this 1955 vintage. Ya might want to view the sawdust session here. Starting with #21.
http://www.shopsmithacademy.com/Sawdust_Sessions.htm
http://www.shopsmithacademy.com/Sawdust_Sessions.htm
SS 500(09/1980), DC3300, jointer, bandsaw, belt sander, Strip Sander, drum sanders,molder, dado, biscuit joiner, universal lathe tool rest, Oneway talon chuck, router bits & chucks and a De Walt 735 planer,a #5,#6, block planes. ALL in a 100 square foot shop.
.
.
Bob
.
.
Bob
I have a 1955 SS and have managed to get all of the accessories (band saw, jointer, lathe tool) and I have overhauled the headstock and it works very well. Suits my needs very well. I am very glad I got it at the right price, and with all of the accessories I still only have $600 in it and that's reasonable for all of the capabilities. I found the Sawdust Sessions to be extremely helpful.
Slim,
Yes, it is worth restoring and is easy to do even if you only have minimal mechanical ability.
Without an access hole there is really only one way to get into headstock and that is to remove the motor pan.
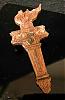
The first thing to do is to remove the belt cover and look at is where the v belt is on the lower sheaves (fan sheave and floating sheave). If the belt is not within an 1/8” of the edge of the sheaves (see attached picture) you will have to attach a sanding disk to the spindle and turn it while you slowly turn the speed dial to high. That will move the belt to the edge of the sheaves, and then you can work the belt off of the sheaves.
The next thing I would do is to remove the nut(s) holding the power switch in the headstock and push the power switch inside the headstock.
Cover the bench tubes with cardboard or carpet scraps and support the motor pan with a jack. Remove the screws holding the motor pan to the headstock and lower it onto the bench tubes. You can then move the motor and pan to a workbench to test it, check the wiring, and blow it out. Make sure that the power switch does not get hung up on anything when you remove the motor.
Once that is done you can work on the headstock as shown in the Sawdust Session. It would probably be easier to work on if you put it in the drill press (vertical) position.
Keep us appraised of yuor progress and we can give you some other pointers. Also, keeping all of the screws and parts in separate containers and listing the container where they came from makes reassembly easier.
Sincerely,
Ron309753
Yes, it is worth restoring and is easy to do even if you only have minimal mechanical ability.
Without an access hole there is really only one way to get into headstock and that is to remove the motor pan.
The first thing to do is to remove the belt cover and look at is where the v belt is on the lower sheaves (fan sheave and floating sheave). If the belt is not within an 1/8” of the edge of the sheaves (see attached picture) you will have to attach a sanding disk to the spindle and turn it while you slowly turn the speed dial to high. That will move the belt to the edge of the sheaves, and then you can work the belt off of the sheaves.
The next thing I would do is to remove the nut(s) holding the power switch in the headstock and push the power switch inside the headstock.
Cover the bench tubes with cardboard or carpet scraps and support the motor pan with a jack. Remove the screws holding the motor pan to the headstock and lower it onto the bench tubes. You can then move the motor and pan to a workbench to test it, check the wiring, and blow it out. Make sure that the power switch does not get hung up on anything when you remove the motor.
Once that is done you can work on the headstock as shown in the Sawdust Session. It would probably be easier to work on if you put it in the drill press (vertical) position.
Keep us appraised of yuor progress and we can give you some other pointers. Also, keeping all of the screws and parts in separate containers and listing the container where they came from makes reassembly easier.
Sincerely,
Ron309753
- Attachments
-
- Speed_Control_1.jpg (21.08 KiB) Viewed 4358 times
-
RobertTaylor

- Platinum Member
- Posts: 569
- Joined: Mon Sep 03, 2007 9:28 am
- Location: North Canton, Ohio
on all older units that i work on after removing the motor i use a hole saw and cut an access hole for future use. while in the headstock i also drill oil holes in the control sheave and floating sheave if they are not already there.
Bob
1954 greenie, 1963 anniversary edition now a mini,
1984 500, 1985 510, 1987 510, pro-planer, bandsaw, dust collector
1954 greenie, 1963 anniversary edition now a mini,
1984 500, 1985 510, 1987 510, pro-planer, bandsaw, dust collector
-
JPG

- Platinum Member
- Posts: 35600
- Joined: Wed Dec 10, 2008 7:42 pm
- Location: Lexington, Ky (TAMECAT territory)
A good alternative re motor removal, is to:
1) Raise the way tubes etc. to vertical. (make sure the headstock and carriage locks prevent them from sliding along the way tubes) Lock into vertical position(the knob on the end casting).
2) Insert the table into the carriage(backwards) so as to create a table under the motor pan.
3) Remove the motor pan screws and gently allow the it(and the motor) to drop onto the table thus formed.
1) Raise the way tubes etc. to vertical. (make sure the headstock and carriage locks prevent them from sliding along the way tubes) Lock into vertical position(the knob on the end casting).
2) Insert the table into the carriage(backwards) so as to create a table under the motor pan.
3) Remove the motor pan screws and gently allow the it(and the motor) to drop onto the table thus formed.
╔═══╗
╟JPG ╢
╚═══╝
Goldie(Bought New SN 377425)/4" jointer/6" beltsander/12" planer/stripsander/bandsaw/powerstation /Scroll saw/Jig saw /Craftsman 10" ras/Craftsman 6" thicknessplaner/ Dayton10"tablesaw(restoredfromneighborstrashpile)/ Mark VII restoration in 'progress'/ 10E[/size](SN E3779) restoration in progress, a 510 on the back burner and a growing pile of items to be eventually returned to useful life. - aka Red Grange
╟JPG ╢
╚═══╝
Goldie(Bought New SN 377425)/4" jointer/6" beltsander/12" planer/stripsander/bandsaw/powerstation /Scroll saw/Jig saw /Craftsman 10" ras/Craftsman 6" thicknessplaner/ Dayton10"tablesaw(restoredfromneighborstrashpile)/ Mark VII restoration in 'progress'/ 10E[/size](SN E3779) restoration in progress, a 510 on the back burner and a growing pile of items to be eventually returned to useful life. - aka Red Grange
-
mickyd

- Platinum Member
- Posts: 2999
- Joined: Mon Feb 09, 2009 1:18 pm
- Location: San Diego, CA
- Contact:
This post (courtesy shipwright) puts jpg's words into pictures.JPG40504 wrote:A good alternative re motor removal, is to:
1) Raise the way tubes etc. to vertical. (make sure the headstock and carriage locks prevent them from sliding along the way tubes) Lock into vertical position(the knob on the end casting).
2) Insert the table into the carriage(backwards) so as to create a table under the motor pan.
3) Remove the motor pan screws and gently allow the it(and the motor) to drop onto the table thus formed.

Mike
Sunny San Diego
Sunny San Diego
-
JPG
- Platinum Member
- Posts: 35600
- Joined: Wed Dec 10, 2008 7:42 pm
- Location: Lexington, Ky (TAMECAT territory)
Do not be concerned that Shipwright used this method on a Model 10ER. It will also work with a Mark 5/V/VII.
FWIW, the 'thanks' has nothing to do with this 'method'.
FWIW, the 'thanks' has nothing to do with this 'method'.
╔═══╗
╟JPG ╢
╚═══╝
Goldie(Bought New SN 377425)/4" jointer/6" beltsander/12" planer/stripsander/bandsaw/powerstation /Scroll saw/Jig saw /Craftsman 10" ras/Craftsman 6" thicknessplaner/ Dayton10"tablesaw(restoredfromneighborstrashpile)/ Mark VII restoration in 'progress'/ 10E[/size](SN E3779) restoration in progress, a 510 on the back burner and a growing pile of items to be eventually returned to useful life. - aka Red Grange
╟JPG ╢
╚═══╝
Goldie(Bought New SN 377425)/4" jointer/6" beltsander/12" planer/stripsander/bandsaw/powerstation /Scroll saw/Jig saw /Craftsman 10" ras/Craftsman 6" thicknessplaner/ Dayton10"tablesaw(restoredfromneighborstrashpile)/ Mark VII restoration in 'progress'/ 10E[/size](SN E3779) restoration in progress, a 510 on the back burner and a growing pile of items to be eventually returned to useful life. - aka Red Grange
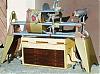
Recent Reactivation - Recondition
This is a recent reactivation that needed the replacement of a stripped Speed Control Quadrant to end the tripping of the circuit breaker when switched on and it attempted to start at a high speed setting. Medium Green Hammerite was used because Verde Green Rustoleum was not available. Rustoleum Hammered Silver was used for the Headstock.
These are excellent, machines and are easy to align and use.
- Attachments
-
- 50621374.JPG (38.1 KiB) Viewed 4341 times
MK V 520; MK V 510 w/PP DIY Upgrade; MK 5 500; Jointer; Bandsaw; Sliding Table; Conical Sanding Disk; Sharpening Guide, Lathe Duplicator, Jigsaw, Scrollsaw, Beltsander, Ring Master, Biscuit Joiner.