OPR Parts

Forum for Maintenance and Repair topics. Feel free to ask questions or contribute.

Moderator: admin

Post Reply
wgander
Gold Member
Posts: 179
Joined: Sun Mar 02, 2008 2:35 pm
Location: San Diego, CA/Kittanning, PA
Contact:

OPR Parts

Post by wgander »

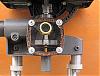
Will someone please post a photo of the Spacer Block (Ref part 83, 515513) and 1/4", 1/2" and 3/8" Pins (ref parts 46,47,48, 515499,515500,515502)? I don't know what these parts look like.
I haven't used my Routing System (555413) overarm and under table, with router table upgrade for years.
User avatar
reible
Platinum Member
Posts: 11283
Joined: Thu Jul 20, 2006 12:08 pm
Location: Aurora, IL

Post by reible »

Requested photo
[ATTACH]13703[/ATTACH]

Ed
Attachments
DSCF1561sc.jpg
DSCF1561sc.jpg (81.66 KiB) Viewed 1920 times
{Knight of the Shopsmith} [Hero's don't wear capes, they wear dog tags]
wgander
Gold Member
Posts: 179
Joined: Sun Mar 02, 2008 2:35 pm
Location: San Diego, CA/Kittanning, PA
Contact:

Thanks

Post by wgander »

Thank you.
The pins are probably in a box with all of my router bits. I don't remember seeing anything like the spacer; I'll have to look again and probably order one. Without it, the overarm holder, safety shield and dust collector aren't very secure.
User avatar
reible
Platinum Member
Posts: 11283
Joined: Thu Jul 20, 2006 12:08 pm
Location: Aurora, IL

Post by reible »

Hi,

If you want I can add some dimensions and you can just make one out of wood. It is not a critical sized piece and they may not carry it anymore anyway.

Ed
{Knight of the Shopsmith} [Hero's don't wear capes, they wear dog tags]
wgander
Gold Member
Posts: 179
Joined: Sun Mar 02, 2008 2:35 pm
Location: San Diego, CA/Kittanning, PA
Contact:

dimensions

Post by wgander »

Ed, thanks: please post or email (wgander1@comcast.net) the dimensions for me.

Bill
User avatar
reible
Platinum Member
Posts: 11283
Joined: Thu Jul 20, 2006 12:08 pm
Location: Aurora, IL

Post by reible »

Hi,

Looks like maybe some 1/2" plywood/MDF for the bottom part then glue on a 1/4" part of like material and spray black should do it.

[ATTACH]13738[/ATTACH]

Ed
Attachments
dim1.jpg
dim1.jpg (65 KiB) Viewed 1872 times
{Knight of the Shopsmith} [Hero's don't wear capes, they wear dog tags]
wgander
Gold Member
Posts: 179
Joined: Sun Mar 02, 2008 2:35 pm
Location: San Diego, CA/Kittanning, PA
Contact:

Thanks

Post by wgander »

Thank you...
User avatar
peterm
Platinum Member
Posts: 576
Joined: Mon Jan 18, 2010 2:52 pm
Location: Dartmouth, NS, Canada

Post by peterm »

Ed
Nice job of marking the photo with dimensions and arrows............what program did you use, please?
Peter
a 510,a Mini, dedicated SS drillpress, SS spt's, home made SS belt grinder, SS piston air system, Southbend 10k lathe, mill/drill, Taig
User avatar
reible
Platinum Member
Posts: 11283
Joined: Thu Jul 20, 2006 12:08 pm
Location: Aurora, IL

Post by reible »

Thanks.

The program is Micrografx Designer which is no longer around, sadly.

Ed

prmindartmouth wrote:Ed
Nice job of marking the photo with dimensions and arrows............what program did you use, please?
{Knight of the Shopsmith} [Hero's don't wear capes, they wear dog tags]
User avatar
peterm
Platinum Member
Posts: 576
Joined: Mon Jan 18, 2010 2:52 pm
Location: Dartmouth, NS, Canada

Post by peterm »

Thanks ED. I did some Googling, found that program is now part of a "suite" sold by Corel and seems to cost $999............guess I will continue to use Excel. ;)
Peter
a 510,a Mini, dedicated SS drillpress, SS spt's, home made SS belt grinder, SS piston air system, Southbend 10k lathe, mill/drill, Taig
Post Reply