glue up/ glue selection
Moderator: admin
-
trainguytom

- Gold Member
- Posts: 324
- Joined: Sat Feb 10, 2007 7:22 pm
- Location: Central WI
I use liquid hide glue on almost all my furniture projects because it's more than strong enough, has a long working time & ends up being the least visible. My projects don't get wet, so waterproofness (spell check says that's not a real word) is not an issue.
My dad's 1951 10er, 2 more 10er's, same vintage, a Goldie MK5, a 510 shortie with 34inch tubes, bandsaw, jointer, jigsaw, belt sander, a ton of small SS goodies and still looking...you just can't have enough Shopsmith stuff
-
shipwright

- Platinum Member
- Posts: 1165
- Joined: Tue Dec 15, 2009 7:28 pm
- Location: Vancouver Island, Canada
- Contact:
Just a note in defense of hide glues. They require heat and moisture to be reversed. If you've ever needed to reverse it you wouldn't worry about it not being waterproof. Unless you plan to take your furniture into the bath with you, don't worry about it.
On the other hand if you ever need to reverse it, you can, unlike the synthetic glues and you won't have to remove every trace of old glue before re-gluing.
Since I started using it, I almost never use anything else.
Paul M
On the other hand if you ever need to reverse it, you can, unlike the synthetic glues and you won't have to remove every trace of old glue before re-gluing.
Since I started using it, I almost never use anything else.
Paul M
Paul M ........ The early bird gets the worm but the second mouse gets the cheese
Thanks guys! I don't have time to start on the legs right now, so I will think on your ideas and decide a little later.
I am a lot less concerned now about the 15 minute time on TB II and III types, hide glue seems to be less a mystery than before. I think I may have a better idea of how to sequence everything now as well, I will keep you posted as I go along. It is amazing how just asking a question and listening to answers can clarify things!
I am a lot less concerned now about the 15 minute time on TB II and III types, hide glue seems to be less a mystery than before. I think I may have a better idea of how to sequence everything now as well, I will keep you posted as I go along. It is amazing how just asking a question and listening to answers can clarify things!
Saw dust heals many wounds. RLTW
Dave
Dave

I'm doing a little catch up on my reading tonight and was glad to see this thread. It shows people are thinking before they just go at it... only to get themselves in to places they don't want to go.dlbristol wrote:Thanks guys! I don't have time to start on the legs right now, so I will think on your ideas and decide a little later.
I am a lot less concerned now about the 15 minute time on TB II and III types, hide glue seems to be less a mystery than before. I think I may have a better idea of how to sequence everything now as well, I will keep you posted as I go along. It is amazing how just asking a question and listening to answers can clarify things!
I too have got myself in trouble at glue time. Now I try to design the project so I don't get too many situations where I have to rush to get the assembly done in anything but smaller units of sub-assemblies. Not always possible but it doesn't hurt to try.
I had never been that interested in nailers but watching Norm using them to hold parts while the glue set caused me to change how I did things and added nailers to my shop. That seems like forever ago and it almost seems that is how I've always done it. Great time saver.
The other thing that seems a universal issue is having enough clamps. I know that slows my projects down from time to time. Next years budget I'm going to add a few more to the collection... I think that has been on the list the last years but this time I mean it!
Ed
Hey Ed, I appreciate the post, I am learning, I have just " gone at it" and really gotten into a mess! The issue with this assembly is not that it is really complicated, it is not, but it has to be right. I have the jig they use, and I added another stop to it, to keep things in line. I messed with it a bit this AM and After a few tries, I can do the assembly in about 3 minutes. That leaves about 8 good minutes for the glue going on and final alignment. The " through mortis" at the bottom is the area that concerns me most. There is no room for an error there, no fix appears to be available if you mess that up. On top, a small error could be fixed with a bit of trimming. The bench does not require all of the bench frame to be done at one time, just 1 leg at a time.
Saw dust heals many wounds. RLTW
Dave
Dave
I finally did one of the simpler assemblies on Saturday and it went well. I used Titebond II without any issue. I really had more problems with to much glue and lots of squeeze out, but no real time issues. Cleaning these up will take some time, but that was anticipated in the plans. When I start the leg assemblies, I am going to get an other set of helping hands, and a bigger glue applicator. I started taking pictures of the process, so when I get further along I will post some of them.
Saw dust heals many wounds. RLTW
Dave
Dave
Here are some pictures of the assembly portion of the bench and the mostly completed project. The top is a recycled solid core door and the vise is recycled from an old school shop. It is an 8 in Columbian. #1 is just the cut slats for all the legs and stretchers, #2 is a shot of the assembly jig for the stretchers, ( this was the one I was concerned about as far as glue time), # 3 is the front and back frame assemblies, #4 is the instalation of the end panels, and the last is of the bench with drawers installed.
- Attachments
-
- IMG_5729.JPG (193.46 KiB) Viewed 1990 times
-
- IMG_5733.JPG (170.93 KiB) Viewed 1991 times
-
- IMG_5807.JPG (170.79 KiB) Viewed 1990 times
-
- IMG_5808.JPG (177.13 KiB) Viewed 1989 times
-
- IMG_5825.JPG (196.38 KiB) Viewed 1995 times
Saw dust heals many wounds. RLTW
Dave
Dave
router table experiment
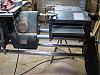
Another project that I finished was this attempt at getting a router onto the MV. I am to cheap to by a new router and table, so I tried using my old Sears router and table and mounted it between the main table and a auxillary table from an old Mark 2. Not real pretty, but it works and saves a bunch of space. I hang it on the miter saw frame when not on use.
- Attachments
-
- router table experiment.JPG (183.94 KiB) Viewed 1994 times
Saw dust heals many wounds. RLTW
Dave
Dave
Today i have a question which is that I have a heart shaped pendant that has tiny crystals around it. One of the crystals has fallen out. There is an indentation for the stone. Is there a special glue I should use to put the stone back in good suggeston would be appreciated.tile cleaning gold coast

Depends on how valuable it is. If valuable, take it to a jeweler and get the stone re-set. Otherwise try a drop of CA glue.anderson0 wrote:Today i have a question which is that I have a heart shaped pendant that has tiny crystals around it. One of the crystals has fallen out. There is an indentation for the stone. Is there a special glue I should use to put the stone back in good suggeston would be appreciated.
Regards,
Doug
Shopsmith Mark V ->Mark 7, bandsaw, jointer, planer, belt sander
Doug
Shopsmith Mark V ->Mark 7, bandsaw, jointer, planer, belt sander