I am continuing to experiment with deck shapes.
My first experiment left me with a peaked deck. I tried to sand this into a smooth radius but that proved to be a non-trivial job. I got the peak rounded over but the only shape I could get was a kind of hump. Nothing I would call a radius.
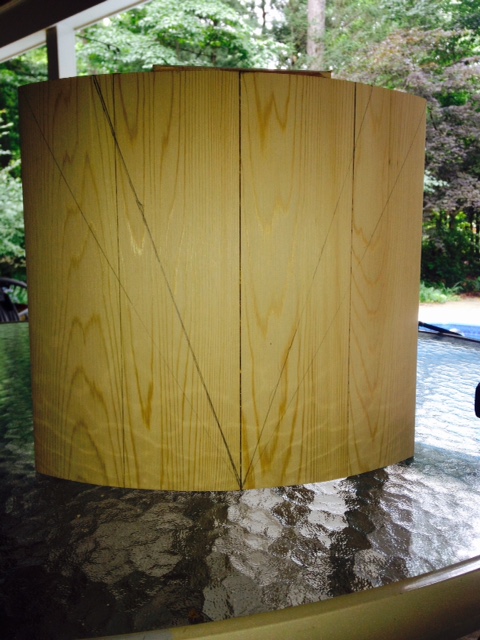
Experiment no. 2 was to mock up a semi-circular panel. To do this, I used a birdsmouth joint (a first for me and something I learned off of one of Shipwright's posts). Although the canoe is only about 7-8 inches at its widest where the decks go, I estimated that I wanted an arc from a circle about 20 inches in diameter to keep the visible radius not too great. I used a calculator I found on this boat magazine website
http://www.duckworksmagazine.com/10/how ... /index.htm, to calculate the necessary thickness and width of the pieces to make a complete cylinder. These ended up being 16 pieces about 3/4 thick by 4 3/8 wide with angles of 20 and 70 degrees forming the birdmouths. Of course since I wasn't doing a complete cylinder I only needed 4 pieces to get the part of the arc I wanted. In fact, I barely needed more than two. Had I been smarter I would have done three pieces. My method ended up being quite wasteful.
Cutting the pieces was really easy to do on the Shopsmith, tilted table and all. But the panel was a challenge to glue up because I did not do a complete cylinder. So, for purposes of this mock up I just used some CA glue, which sets quickly. When I do the real deck I will be using epoxy and will have to figure out some other way of clamping (BuckeyeDennis suggested pinch dogs on another thread and I think he's put me on the right track).
The panel came out fine and the cedar sanded out to a pretty smooth arc on the Shopsmith beltsander with an 80 grit belt, just working by eye, resting the bottom on the table and rotating the panel around an imaginary point. (I did knock off the peaks with a plane first so there wasn't as much sanding to be done).
- image3.JPG (127.01 KiB) Viewed 7269 times
- image1.JPG (165 KiB) Viewed 7269 times
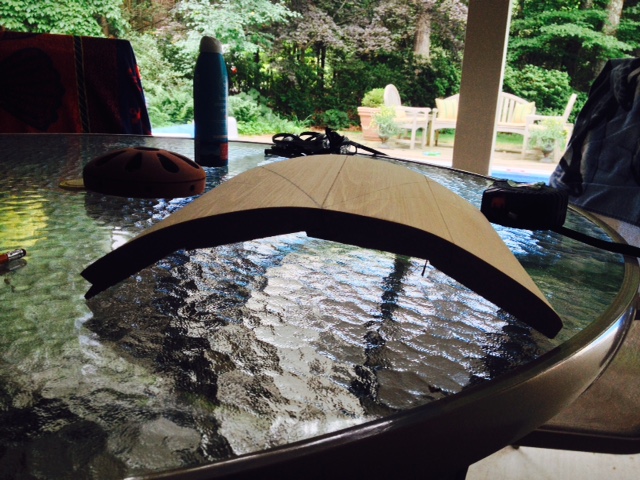
Then I cut a wedge out to match the canoe shape. I used the Shopsmith band saw and free handed it. Cleaned the edges up on the belt sander.
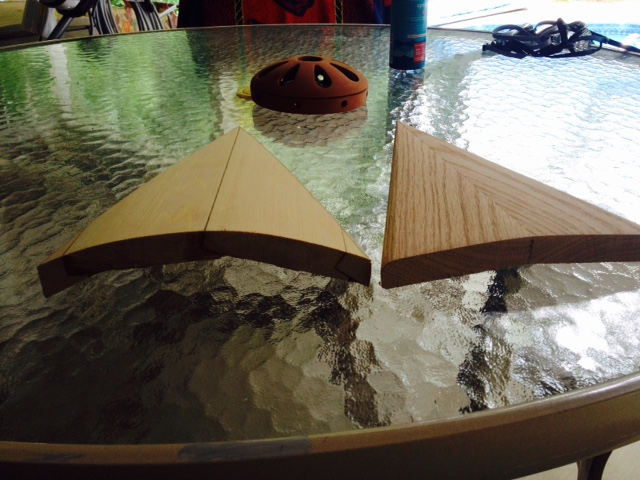
Side by side with the original deck, I much prefer the smooth shape of experiment no. 2 (true radius) to experiment no. 1 (peaked and then sanded to a hump). Experiment 2 is on the left in the below photos.
- image4.JPG (131.26 KiB) Viewed 7269 times
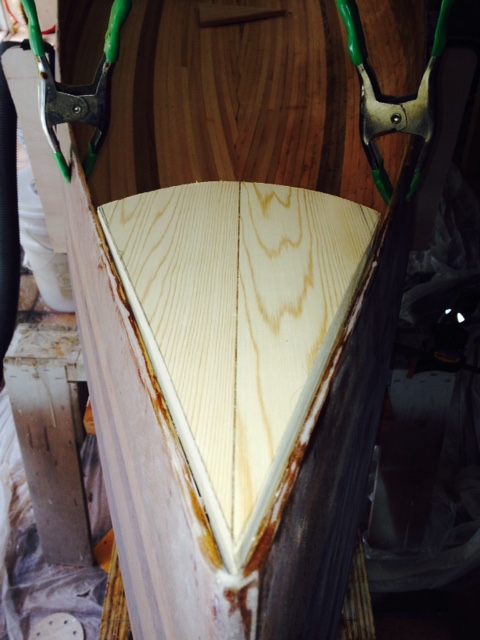
But I much prefer the converging look of the grain on experiment no. 1 than the straight grain on experiment no. 2 (doesn't show in the above photo but you will see how ugly the grain looks in the photos below where it is mock installed in the canoe).
- image3(1).JPG (97.3 KiB) Viewed 7269 times
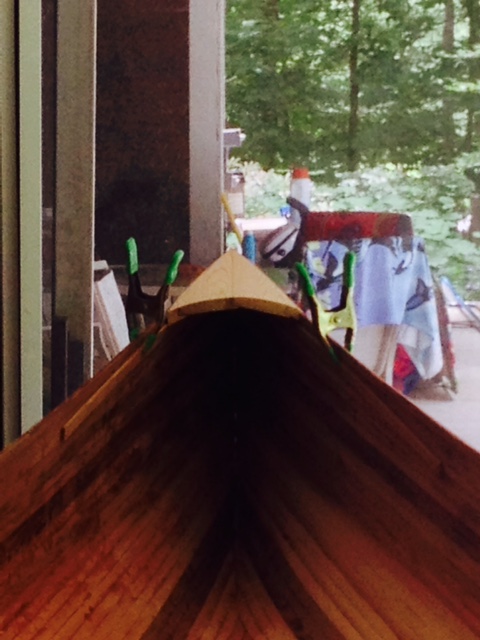
- image2(1).JPG (98.32 KiB) Viewed 7269 times
In Sapele, which has much straighter grain and less or no cathederal arching as compared to the cedar I used in this mock up, the difference may not be quite as bad.
But it occurs to me that I could in theory veneer experiment no. 2 with a couple of triangular slices of Sapele arranged as in experiment no. 1 to get the same effect of the grain converging (I say "in theory" because I have never veneered anything but I figure there's enough expertise on the forum to walk me through it).
Another draw back on experiment no. 2 is the bottom edge. Smoothing the outside was easy. I've done nothing to smooth the inside but I can tell it will be very hard to do. The facets from the birdsmouth joints are very ugly and distracting. Of course in a complete cylinder these would be on the inside and never visible. Experiment no. 3 may be to try to cooper the panel with many more narrower pieces oriented vertically.
Any and all comments, criticisms, suggestions are welcome.
-Al


