
Check this out:
[ATTACH]9210[/ATTACH]
Some of you might be wondering about the usefulness of the PTO so here are a few other things you could do. One would be to mount a drill chuck, universal arbor for a buffing wheel or perhaps a router chuck to hold yet another tool... maybe another sanding item like a fluff sander.
[ATTACH]9211[/ATTACH]
Of course a sanding disk is always an option but you might want to think of adding a extension table to work off of. (Sorry no dust collection attachment, yet).
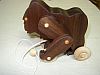
[ATTACH]9212[/ATTACH]
This last one I just had to try. I was to lazy to dig out the 6" drum sander but since I had the 3" one out already.... So here it is the sand-ed driving a sand-free!!!!!!!!!!!!!!!! I just got to stop having so much fun.
[ATTACH]9213[/ATTACH]
Or it could be titled 2007 meets 2010.
For those of you who have never seen the "sand almost free" project or just want to check it out again it is at:
https://forum.shopsmith.com/viewtopic.php?t=863
Ed
Basic or not so, general interest??
Moderator: admin
How did you sneak a post in between all my post tonight???charlese wrote:Good thing all you have to do to get a raw end is to twist off the Shopsmith coupling.
Very good point charlese, many hose have screw on ends and if that is the type you have then you have a solution as close as your nearest hose.
Ed
{Knight of the Shopsmith} [Hero's don't wear capes, they wear dog tags]
Hi,
I was trying to do my home work and figure out how fast I should be running the sand-ed. My previous work was lost in a hard disk incident so from ground zero I go.
I went to the people who make the "V" drum kit and they have two models, one of which they said is 4", just a little bigger then the drum I have. It sounds like they would like a motor running at about 1725 RPM but they seem to have two different pulley and from that I gather they speed up the drum.
If my guess is correct then the drum might be about 2250 RPM. If the 4" is an actual measurement I can then find the correct speed for the sand-ed based on my drum size.
So here are the issues, the box they have pictured is for the smaller 18" drum with smaller diameter drum. This is listed with the two different diameter pulleys. Not sure what comes in the 4" dia. version so it could be a different ratio or maybe just the motor speed.
The shopsmith will of course allow me to adjust the speed but I'd like a clearer idea what that speed might be. It would seem any thing between K and N might work. (2050 rpm to 2600 rpm)
Does anyone here have one of these "V" machines and could you tell me pulley diameters and motor rpm and the diameter of the drum??
The other option might be the shopsmith sand-flee if I could get the drum diameter and the recommended speed setting??
According to the weatherperson I have 2 possible dates to do my testing, Wed. or Thur. After that I'm off again on another trip.
So much to do and so little time.
Ed
{Knight of the Shopsmith} [Hero's don't wear capes, they wear dog tags]
-
JPG

- Platinum Member
- Posts: 35457
- Joined: Wed Dec 10, 2008 7:42 pm
- Location: Lexington, Ky (TAMECAT territory)
I ===== approximately 1750 rpm.greitz wrote:The Shopsmith SAND-FLEE manual says to run it no faster than "I" on the speed dial. My drum measures 2 1/8" in diameter (with sandpaper attached).
Hope that helps! Thanks for the excellent documentation on this project.
Gary
╔═══╗
╟JPG ╢
╚═══╝
Goldie(Bought New SN 377425)/4" jointer/6" beltsander/12" planer/stripsander/bandsaw/powerstation /Scroll saw/Jig saw /Craftsman 10" ras/Craftsman 6" thicknessplaner/ Dayton10"tablesaw(restoredfromneighborstrashpile)/ Mark VII restoration in 'progress'/ 10E[/size](SN E3779) restoration in progress, a 510 on the back burner and a growing pile of items to be eventually returned to useful life. - aka Red Grange
Yes that helps! Thanks!greitz wrote:The Shopsmith SAND-FLEE manual says to run it no faster than "I" on the speed dial. My drum measures 2 1/8" in diameter (with sandpaper attached).
Hope that helps! Thanks for the excellent documentation on this project.
Gary
I was thinking of starting at a lower speed and working my way up just to see how stable the thing is, and wondering where top end should be.
I only purchased a roll of 120 grit but before I order another roll or 2 I want to make sure it is really working. Didn't get to work on it today.... only a few days left and I'll be on a trip again, like to be able to report how it is working before that delay starts again.
Ed
{Knight of the Shopsmith} [Hero's don't wear capes, they wear dog tags]
This afternoon I officially went into testing mode. I learned a few things so I try and post them here.
Starting with speed, the unit has no major vibration issues within the ranges I ran today. At to low a speed it doesn't sand, at to high a speed it starts having issues with the end of the sandpaper starting to come off. I went to a speed setting of M and with in a short while I started hearing a ticking sound, that turned out to be the very end of the sandpaper coming off. As you might remember I have notch on the leading edge as a design feature. The far end the paper is rotating the right way so it will not catch... but it will start lifting off. I attempted to cut back a short way but that did not help. For my set up M is just to fast.
Setting at K seems to be fine and I had no lift off problems at this speed but I've only had the paper on and off maybe 10 - 12 times so it could be that at some point even that could be to fast. For now that is going to be my go to speed.
Installing the sandpaper is also a bit more of a art then the videos show. If you wrap it to tight it doesn't seem to work right, it is more of a loose wrap. I have no instructions to go by but it seems there is some amount of "art" involved.
The depth of cut seems a little finer then I had expected. What I did was take a board and measure it with a dial caliper at a marked distance along the board. I ran the board over the sander 10 times then recorded the new measurement. After several test the results seems to indicate that 10 passes removes just .004". A little math says that it is taking off only .0004" per pass!!! All testing was done with the same piece of 120 grit paper.
I also found I could deflect the top my pushing down hard on the work piece. You really should not do that but I wanted to know just how stable it was. I will be thinking about this and deciding if I need to add some additional support to the under side of the top (if I can). I can do that in a direction parallel to the drum but have no way to do it in the other direction. So step one will be figuring out in which direction the flexing is occurring.
All in all the concept seems to work. The drum is not getting warm, the sandpaper stays on. The PVC drum doesn't seem to be an issue with collecting dust... The only negative is it weights more then I would like... I have yet to check that but it is pretty solid box.
I still want to do a few things to complete this thread but that will have to be in about 2 weeks. I had a spread sheet with costs but lost that too in my hard disk crash so I will have to did out the invoices again to do that again.
In the mean time feel free to ask questions or leave comments. I'll get to them as I get to them.
Ed
{Knight of the Shopsmith} [Hero's don't wear capes, they wear dog tags]
-
dewey2me1mothyme

- Gold Member
- Posts: 46
- Joined: Wed Apr 28, 2010 5:07 pm
- Location: Mt. Vernon, IN
- Contact:
Ed,
When I built my V-drum sander from a Stockroom Supply kit, I also had some flex in the top that I built. I solved this by attaching aluminum angle to the underside of the top, parallel to the drum.
This type of sander does take very light cuts but you can change the depth of cut to some degree by using different grits of sandpaper. I use 60 grit for a more agressive cut and have paper all the way to 320 grit for a super fine finish.
Using the 60 grit, I have used my sander like a jointer and have actually cleaned up rough lumber this way. It takes a little longer than a jointer but I can joint wider boards than my 4" jointer can handle.
I have used mine on every project mine I built it and I really like it.